What is MinIO and How to Configure It
in Kubernetes

Our previous article covered container security, so I suppose it would be wise to delve into containerization, namely, into object storage solutions. And MinIO is just one of those.
It’s a solution helping a microservice upload static images to the bucket for post-processing. Further on, I’ll describe our team experience working with MinIO and the steps to configure it in Kubernetes.
Got interested? Great! Let’s take it from the top – the MinIO.
Why MinIO?
We’ve chosen MinIO as the best solution among AWS S3-compatible ones since the client wanted to use the S3-compatible API as a temporary data storage.
MinIO is a high-performance distributed server that quickly and easily organizes object storage. According to the MinIO official website, it is the only object storage suite native to Kubernetes.
Moreover, it’s 100% open-source and available on every public cloud, any Kubernetes distribution, the private cloud, and the edge. Simplistic setup, multiple platforms, and exemplary performance have done their job to conquer IT folks – MinIO is on-trend now.
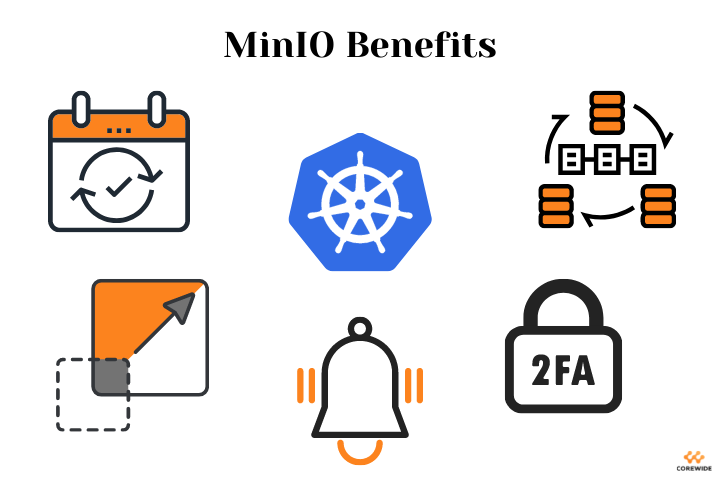
Its other advantages include:

+ High availability
+ Data redundancy
+ Native Kubernetes support
+ Horizontal and vertical scaling
+ Two-factor data encryption
+ Detailed performance monitoring
+ IAM framework that offers more flexible access configuration
+ Notifications about downloading and uploading data in a queue (which was a killer feature in our case)
Indeed, MinIO is brilliant – there were nevertheless some challenges we faced while deploying it. Firstly, we wanted its deployment into the Kubernetes cluster and configuration to be fully automated.
We also prefer using Helm charts over plain Kubernetes manifests, so the installed releases could be manageable. But in our case, Helm charts available for MinIO deployment don’t offer enough flexibility providing only limited functionality.
And last but not least: there’s no way to configure event notifications without editing the entry point of the MinIO container.
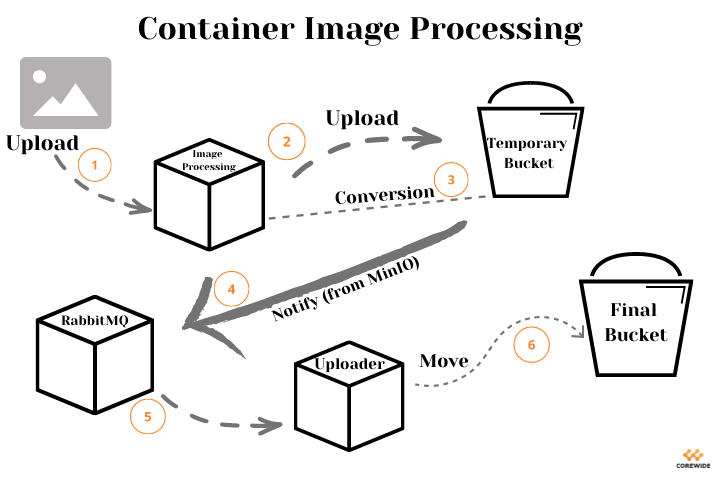
I bet you wonder what the overall design was. Well, a microservice uploads static images to the bucket for post-processing and listens to the queue in RabbitMQ.
Upon receiving a notification about successful file upload to the temporary storage, the microservice needs to transfer it to the permanent one. However, it should have the appropriate tooling to send notifications in RabbitMQ. And here comes MinIO.
If it still sounds a bit vague, look at the visualization of the whole process (the ability to reveal simplicity is the main reason we adore diagrams and graphs).

And now, we’ve come to the best part – configuring MinIO in Kubernetes. Enjoy!
Guide to Configuring MinIO in Kubernetes
The following instructions will help you configure MinIO in Kubernetes, initializing both a user and a target bucket during the deployment. This guide also includes configuring MinIO to send notifications to a RabbitMQ queue about the events from this bucket.
By the way, if you’re a guides’ maniac, we’ve got a set of steps on creating excellent technical documentation – don’t hesitate to check it out.
Getting back to business, the original Helm Chart will be bitnami/minio since it’s one of the most flexible and maintained charts for MinIO. Let’s go!
1. Add the chart repository:
helm repo add bitnami https://charts.bitnami.com/bitnami
helm repo update
2. Create the namespace for MinIO:
kubectl create namespace minio
3. Get Helm chart values and save them into a file:
helm show values bitnami/minio > minio.yaml
4. Use the auth.existingSecret field to safely store root credentials of MinIO. One can also use them for API connection to MinIO. Imagine you’re a spy and create a secret file to add it to the namespace:
secrets.yaml
apiVersion: v1
kind: Secret metadata:
name: minio-root-user
data:
root-user: <base64-encrypted username>
root-password: <base64-encrypted password>
kubectl apply -f secrets.yaml --namespace minio
Then let the Helm chart see this secret file point to it:
auth:
## @param auth.existingSecret Use existing secret for credentials details (`auth.rootUser` and `auth.rootPassword` will be ignored and picked up from this secret). The secret has to contain the keys `root-user` and `root-password`)
##
existingSecret: "minio-root-user"
- Now declare default buckets to be created in MinIO during the release deployment:
## @param defaultBuckets Comma, semi-colon or space separated list of buckets to create at initialization (only in standalone mode)
## e.g:
## defaultBuckets: "my-bucket, my-second-bucket"
##
defaultBuckets: "images, logs"
6. Next, configure the MinIO access to RabbitMQ through the environment variables:
extraEnvVars:
- name: MINIO_NOTIFY_AMQP_ENABLE
value: "on"
- name: MINIO_NOTIFY_AMQP_URL
value: amqp://<rabbitmq-username>:<rabbitmq-password>@<rabbitmq-address>:<rabbitmq-port>
- name: MINIO_NOTIFY_AMQP_EXCHANGE
value: <rabbitmq-exchange>
- name: MINIO_NOTIFY_AMQP_EXCHANGE_TYPE
value: fanout
- name: MINIO_NOTIFY_AMQP_DURABLE
value: "on"
- name: MINIO_NOTIFY_AMQP_DELIVERY_MODE
value: "2"
7. Prepare the Job to configure bucket notifications. We need a Kubernetes entity that is working until it executes the commands described inside – Job is a perfect match. In our case, it configures notifications to the RabbitMQ queue when starting pods with MinIO. First of all, find out the bucket ARN:
kubectl logs <minio-pod-name> --namespace minio
… and find the line SQS ARNs: <Minio ARN> in logs. Then prepare a Job file:
apiVersion: batch/v1
kind: Job
metadata:
name: minio-event
spec:
template:
spec:
containers:
- name: minio-event-configuration
image: minio/mc
env:
- name: MC_HOST_minio
value: "https://<minio_api_key>:<minio_api_token>@<minio_api_url>"
command: ["mc", "event", "add", "minio/<bucket_name>", "<minio_arn>"] restartPolicy: Never
backoffLimit: 4
8. The last step is to deploy the chart and the Job:
kubectl apply -f minio-job.yaml --namespace minio
helm install minio bitnami/minio --namespace minio --values minio.yaml
After that, you can log in to the interface with access from secrets.yaml. And from now on, when changing the bucket content, the MinIO will send notifications to the RabbitMQ queue.
Wrapping Up
MinIO is an excellent solution, especially for those who seek AWS alternatives. Why?
Well, there’re lots of reasons like data transfer to another entity – it’s a paid feature in AWS but a free one if you use MinIO. Or the upload time in MinIO is higher than in AWS, provided the fast network connection.
At Corewide, we value flexible and modern solutions and apply them in every project to meet our clients’ requirements and guarantee superior performance.
If you’re a fan of such tooling, too, try MinIO – it will surely cover the most sophisticated demands.